Getting started with .NET Aspire
A step-by-step guide to building your first .NET Aspire application, covering project structure, service discovery, and the Aspire dashboard.
This article will guide you through building your first .NET Aspire application. If you want an overview of .NET Aspire and what it brings to the table, check out our What is .NET Aspire article.
Prerequisites
There are a few things you need to have ready before you get started with .NET Aspire:
- Visual Studio 2022 Preview (version 17.9 or higher)
- with the .NET Aspire workload installed
- and .NET 8.0
- Docker Desktop
If you prefer not to use Visual Studio, you can also install .NET Aspire using the dotnet CLI using the dotnet workload install aspire command. And then you are free to use whichever IDE you like.
For a comprehensive guide on how to install all the required .NET Aspire prerequisites, check out How to install .NET Aspire.
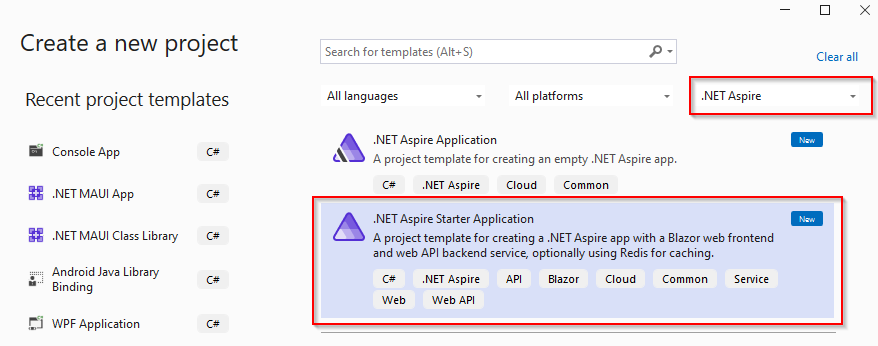
Create new project
In Visual Studio, go to File > New > Project, select .NET Aspire in the project type dropdown, or search for the word “Aspire”. This should bring up two templates:
- .NET Aspire Application – an empty .NET Aspire project template.
- .NET Aspire Starter Application – a more comprehensive project template containing a Blazor frontend, an API backend service, and – optionally – caching using Redis.
We will choose the .NET Aspire Starter Application template for our first .NET Aspire app.
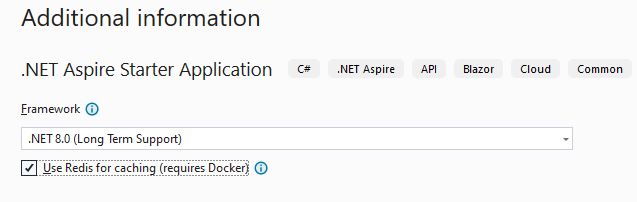
Give your project a name, and make sure that, in the Additional information dialog, you enable the Use Redis for caching option. This is entirely optional, but it serves as a good example of what .NET Aspire can do for you.
Using dotnet CLI
You can also create .NET Aspire apps using the dotnet CLI. For creating an app using the .NET Aspire Starter Application template, use the following command, replacing Foo with your desired solution name.
dotnet new aspire-starter --use-redis-cache --output FooProject structure
With the .NET Aspire solution created, let’s have a look at its structure. You should have 4 projects under your solution:
- ApiService: an ASP.NET Core API project used by the frontend to retrieve data.
- AppHost: acts as an orchestrator by connecting and configuring the different projects and services of your .NET Aspire application.
- ServiceDefaults: a shared project used to manage configurations related to resilience, service discovery, and telemetry.
- Web: a Blazor application acting as our frontend.
The dependencies between the projects look like this:
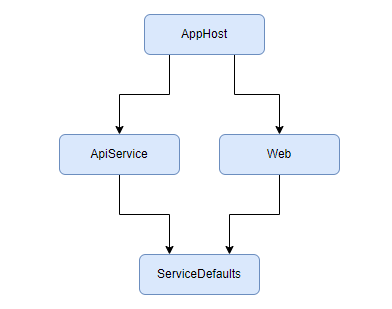
Let’s start at the top.
AppHost project
This is our .NET Aspire solution orchestrator project. Its role is to connect and configure the different projects and services of our .NET Aspire application.
Let’s have a look at its .csproj file:
<Project Sdk="Microsoft.NET.Sdk">

  <PropertyGroup>
    <OutputType>Exe</OutputType>
    <TargetFramework>net8.0</TargetFramework>
    <ImplicitUsings>enable</ImplicitUsings>
    <Nullable>enable</Nullable>
    <IsAspireHost>true</IsAspireHost>
  </PropertyGroup>

  <ItemGroup>
    <ProjectReference Include="..\Foo.ApiService\Foo.ApiService.csproj" />
    <ProjectReference Include="..\Foo.Web\Foo.Web.csproj" />
  </ItemGroup>

  <ItemGroup>
    <PackageReference Include="Aspire.Hosting" Version="8.0.0-preview.1.23557.2" />
  </ItemGroup>

</Project>
Two things will stand out:
- the
IsAspireHostelement which explicitly marks this project as being our solution’s orchestrator - the
Aspire.Hostingpackage reference. This package contains core API and abstractions for the .NET Aspire application model. Since the framework is still in preview, the .NET Aspire NuGet packages are marked as preview releases as well.
Let’s look next at Program.cs. You’ll notice there a very familiar builder pattern used to link together the different projects and to enable caching.
var builder = DistributedApplication.CreateBuilder(args);

var cache = builder.AddRedisContainer("cache");

var apiservice = builder.AddProject<Projects.Foo_ApiService>("apiservice");

builder.AddProject<Projects.Foo_Web>("webfrontend")
    .WithReference(cache)
    .WithReference(apiservice);

builder.Build().Run();
What the code above essentially does is the following:
- creates an
IDistributedApplicationBuilderinstance used to build ourDistributedApplication - creates a
RedisContainerResourcewhich we can reference later in our projects and services - adds our
ApiServiceproject to the application and holds an instance to theProjectResource - adds our
Webproject to the application, referencing the Redis cache and theApiService - before finally calling
Build()to build ourDistributedApplicationinstance, andRun()to run it.
ApiService project
The ApiService project exposes a /weatherforecast endpoint which we can consume from our Web project. In order to make the API available for consumption, we registered it in our AppHost project, and gave it the name apiservice.
builder.AddProject<Projects.Foo_ApiService>("apiservice")Web project
The Web project represents our Blazor frontend and consumes the /weatherforecast endpoint exposed by our ApiService. The way it does it is where the .NET Aspire magic starts to really kick in.
You’ll notice that it uses a typed HttpClient:
public class WeatherApiClient(HttpClient httpClient)
{
    public async Task<WeatherForecast[]> GetWeatherAsync()
    {
        return await httpClient.GetFromJsonAsync<WeatherForecast[]>("/weatherforecast") ?? [];
    }
}
Now, if you look inside Program.cs you will notice something interesting on line 14:
builder.Services.AddHttpClient<WeatherApiClient>(client =>
    client.BaseAddress = new("http://apiservice"));
Remember how we gave our ApiService project the name apiservice when adding it as a ProjectResource in our DistributedApplication? Now this line configures the typed WeatherApiClient to use service discovery and connect to a service named apiservice. http://apiservice will automatically resolve to the correct address of our ApiService resource without any additional configuration required on your part.
ServiceDefaults project
Similar to the AppHost project, the shared project is also differentiated through a special project property:
<IsAspireSharedProject>true</IsAspireSharedProject>The project ensures that all the different projects and services are set up in the same way when it comes to resilience, service discovery, and telemetry. It does this by exposing a set of extension methods which can be called by the solution’s projects and services on their own IHostApplicationBuilder instances.
Run the project
In order to run the project, make sure you have the AppHost set up as your start project and hit run (F5) in Visual Studio. Alternatively, you can run the project from the command line, using dotnet run --project Foo/Foo.AppHost, replacing Foo with your project name.
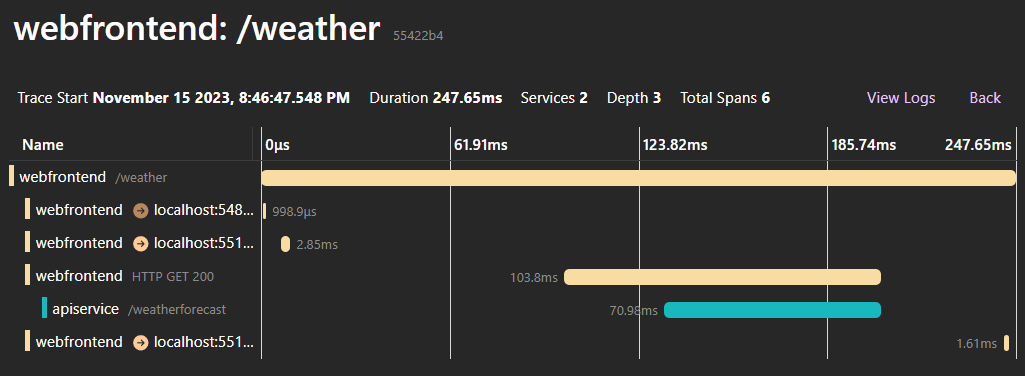
After the application starts, you will be presented with the .NET Aspire dashboard.
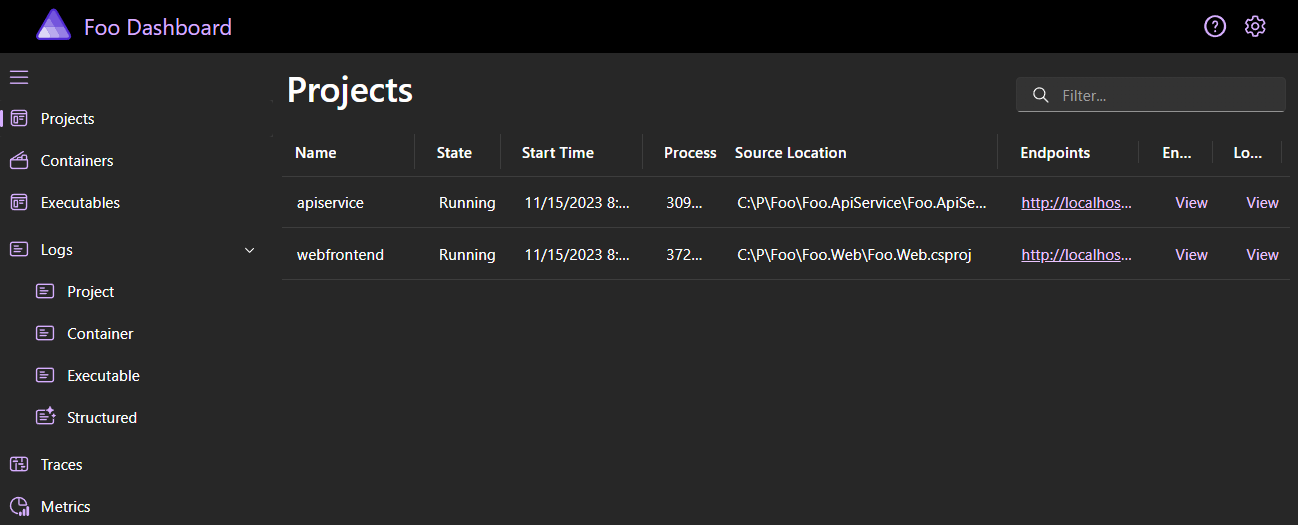
The dashboard allows you to monitor the various parts of your .NET Aspire application: your projects, containers, and executables. It also provides aggregated, structured logs for your services, request traces, and various other useful metrics.
And that’s it! Congratulations on building and running your very first .NET Aspire application!